
How to create a Flower in Adobe Illustrator
Today Online Learning & Earning will show you how to create a Flower in Adobe Illustrator. The tools I use to make a flower are: Ellipse Tool, Gradient Effect, Color Tool and Pen Tool etc. You try this tutorial to learn new techniques.
Step-1
Open a New Document, then using the Ellipse Tool, create an ellipse drawing (measuring it any size).

Step-2
Select: Direct Selection Tool and adjust the angle points, moving until the shape looks perfect.
 Step-3
This shape will be a petal (looks like a heart). For now, in the color box, choose the same color we have below (pink), then Select Gradient Tool to create the shading. You can experiment with different colors later.

Step-4
Select: Rotate Tool, the Rotate box will appear where you have some options Angle -93 than click OK (this position should look like below).
 Step-5
At first in the angle you set (93) then the press Ctrl +D keyboard to duplicate your petal. Do this again for two more petals. Drag your petals together (see picture below). Select Star courser (we are creating the center of the flower) click the mouse then a box an options box will appear. Here is what you will write in the box: Radius 1=70pt, Radius2=170pt, Points=20pt than OK.

Step-6
Show the flower. It should now look like this. Now I want to draw the stem.

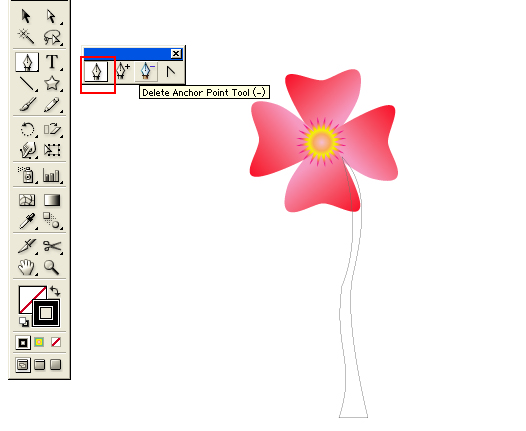
Step-7
Select: Pen Tool draw a stem (Color Green).
 Step-8
Select: Pen Tool and create a Leaf.

Step-9
Select: Reflect Tool show a box>Axis>Vertical>90>OK. Place the second leaf on the other side of the stem. With the Selection Tool move the box corners to make the second leaf bigger.

Step-10
Good work! You've just created a beautiful flower. You have learned a lot today with Online Learning &Earning.

Share this post
Today Online Learning & Earning will show you how to create a Flower in Adobe Illustrator. The tools I use to make a flower are: Ellipse Tool, Gradient Effect, Color Tool and Pen Tool etc. You try this tutorial to learn new techniques.
Step-1
Open a New Document, then using the Ellipse Tool, create an ellipse drawing (measuring it any size).

Step-2
Select: Direct Selection Tool and adjust the angle points, moving until the shape looks perfect.

This shape will be a petal (looks like a heart). For now, in the color box, choose the same color we have below (pink), then Select Gradient Tool to create the shading. You can experiment with different colors later.

Step-4
Select: Rotate Tool, the Rotate box will appear where you have some options Angle -93 than click OK (this position should look like below).

At first in the angle you set (93) then the press Ctrl +D keyboard to duplicate your petal. Do this again for two more petals. Drag your petals together (see picture below). Select Star courser (we are creating the center of the flower) click the mouse then a box an options box will appear. Here is what you will write in the box: Radius 1=70pt, Radius2=170pt, Points=20pt than OK.

Step-6
Show the flower. It should now look like this. Now I want to draw the stem.

Step-7
Select: Pen Tool draw a stem (Color Green).
Select: Pen Tool and create a Leaf.

Step-9
Select: Reflect Tool show a box>Axis>Vertical>90>OK. Place the second leaf on the other side of the stem. With the Selection Tool move the box corners to make the second leaf bigger.

Step-10
Good work! You've just created a beautiful flower. You have learned a lot today with Online Learning &Earning.

Share this post
What a nice Flower.....!!
ReplyDelete