
How to Create a Business Card
Step-1
In Adobe Illustrator, our instructor, Saiful, creates a simple business card. Click on "File", then "New", then "Print Document. A box will appear. Fill in the name of your document. Saiful's sample is titled "Business". Choose size A4 and make sure your units of measurement will be in inches. Click OK.
 Step-2
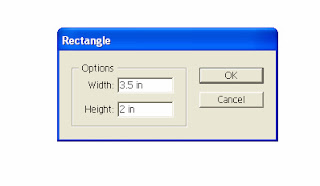
In the side menu click on your "Rectangle" Tool. A box will appear. For this example type in the width 3.5 in and 2 in for the height. Click "OK" Also make sure your rectangle is "No Fill"
Step-3
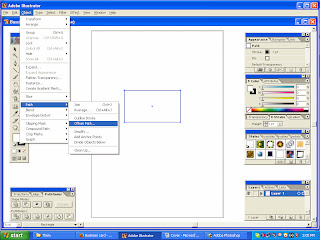
Here we have a nice blank rectangle. Go to the menu and land on "Object". Scroll down to "Path" then over to another scroll "Offset Path".
Step-4
Another box will appear asking your for measurements. Fill in the box as you see in the sample below.

Step-5
This created a nice little box with a margin, like below. Later this margin will be deleted as it is serving as a guide for placing our text and logo.
Right now our box is still white. From the side menu choose the "Color Pallet" tool. Another box with some awesome color choices. You can move those arrows on the color bar up and down. As you do, the big square changes colors too. Once you have the color (Saiful chose blue) it's time to make a choice on tone. Do we want blue with a touch of gray? Do we want a blue that looks stormy and serious? Saiful chose a peaceful blue.

Step-6
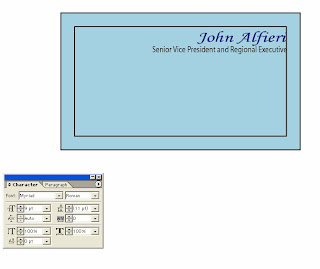
Looking good everyone. Time to add text. Go to your side menu and choose the "Text" tool. Wow, another box to fill out. Choose the type of font you want, the size and alignment. Place your text cursor where you want it and begin typing. Experiment with various texts keeping in mind the person or company you are creating your business card for. Saiful chose a handwriting font that gives a classic look. To make the important information standout Saiful chooses a darker blue color for the name on the business card.

Step-7
Select the text tool again. Here Saiful wants to let us know who "John Alfieri" is. The "Character" box pops up again. It's best to choose a different font and size so it doesn't detract from the important information: Name or Company Name. Saiful leaves the color of this writing black.
Step-8
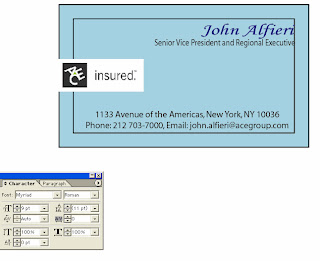
More information needs to be added: Address, Phone, Email, and sometimes websites need to be on business cards. Saiful makes a good decision to put this in a separate spot on the card. He goes back into the text tool. He uses the same font, size, but chooses to align this information center and bottom.

Step-9
Time to add the awesome log. My guess is that Saiful created this logo just for this exercise. Don't you just love the "ACE" denoting a top-notch insurance company? Logo's help customers remember what kind of service is being provided by the name on the business card. To add the logo, just copy and paste into your business card. Here the logo is just the "ACE". Saiful created a white space to place the logo in and add text. Choose the text tool and create the text box and make sure its fill is white. Saiful inserted his logo with the "Insert" tool. In the "Character" box he chose a new font that fits perfectly with the "ACE" logo.
Step-10
Now the only thing that needs to be done is to get rid of that offset line giving a nice clean, ready to print business card.

Thanks Saiful for giving us some awesome instruction.
P.S. to all our readers. Saiful designed an awesome logo for my website- Stay tuned for more information about that. For anybody looking for a good designer I recommend Saiful all the way.
If you have questions for Saiful just leave us a comment. Thanks and hope to see you again soon.
Step-1
In Adobe Illustrator, our instructor, Saiful, creates a simple business card. Click on "File", then "New", then "Print Document. A box will appear. Fill in the name of your document. Saiful's sample is titled "Business". Choose size A4 and make sure your units of measurement will be in inches. Click OK.

In the side menu click on your "Rectangle" Tool. A box will appear. For this example type in the width 3.5 in and 2 in for the height. Click "OK" Also make sure your rectangle is "No Fill"

Step-3
Here we have a nice blank rectangle. Go to the menu and land on "Object". Scroll down to "Path" then over to another scroll "Offset Path".

Step-4
Another box will appear asking your for measurements. Fill in the box as you see in the sample below.

Step-5
This created a nice little box with a margin, like below. Later this margin will be deleted as it is serving as a guide for placing our text and logo.
Right now our box is still white. From the side menu choose the "Color Pallet" tool. Another box with some awesome color choices. You can move those arrows on the color bar up and down. As you do, the big square changes colors too. Once you have the color (Saiful chose blue) it's time to make a choice on tone. Do we want blue with a touch of gray? Do we want a blue that looks stormy and serious? Saiful chose a peaceful blue.

Step-6
Looking good everyone. Time to add text. Go to your side menu and choose the "Text" tool. Wow, another box to fill out. Choose the type of font you want, the size and alignment. Place your text cursor where you want it and begin typing. Experiment with various texts keeping in mind the person or company you are creating your business card for. Saiful chose a handwriting font that gives a classic look. To make the important information standout Saiful chooses a darker blue color for the name on the business card.

Step-7
Select the text tool again. Here Saiful wants to let us know who "John Alfieri" is. The "Character" box pops up again. It's best to choose a different font and size so it doesn't detract from the important information: Name or Company Name. Saiful leaves the color of this writing black.

Step-8
More information needs to be added: Address, Phone, Email, and sometimes websites need to be on business cards. Saiful makes a good decision to put this in a separate spot on the card. He goes back into the text tool. He uses the same font, size, but chooses to align this information center and bottom.

Step-9
Time to add the awesome log. My guess is that Saiful created this logo just for this exercise. Don't you just love the "ACE" denoting a top-notch insurance company? Logo's help customers remember what kind of service is being provided by the name on the business card. To add the logo, just copy and paste into your business card. Here the logo is just the "ACE". Saiful created a white space to place the logo in and add text. Choose the text tool and create the text box and make sure its fill is white. Saiful inserted his logo with the "Insert" tool. In the "Character" box he chose a new font that fits perfectly with the "ACE" logo.
Step-10
Now the only thing that needs to be done is to get rid of that offset line giving a nice clean, ready to print business card.

Thanks Saiful for giving us some awesome instruction.
P.S. to all our readers. Saiful designed an awesome logo for my website- Stay tuned for more information about that. For anybody looking for a good designer I recommend Saiful all the way.
If you have questions for Saiful just leave us a comment. Thanks and hope to see you again soon.